 |
Building up the AXN Floater for some serious UAV fun:
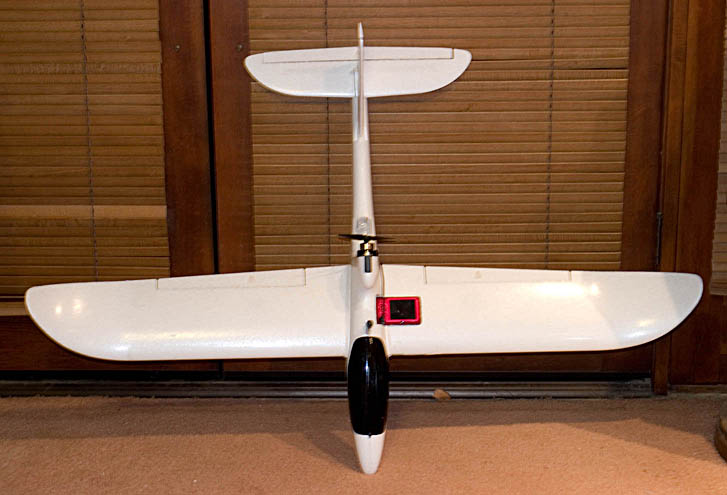
The AXN Floater is an Easy Star clone sold by Hobby King. For 50 of your hard earned dollars plus another 37 for shipping you get a 51 inch wingspan EP foam bird complete with brushless motor, speed controller, ailerons and a full complement of 4 servos. Although not quite as roomy as the Easy, it makes an excellent platform for UAV/FPV work. Just add radio gear and you have an excellent trainer due to it's slow flight characteristics and durability as well as a fun flyer for the more experienced pilot with it's aileron enabled acrobatics and peppy speed. Following the included instructions, you could be in the air after just a couple hours of build time, but I'll show you how I modified the stock plane and installed my PICPilot and other necessary equipment to make a fine UAV platform.
|
|
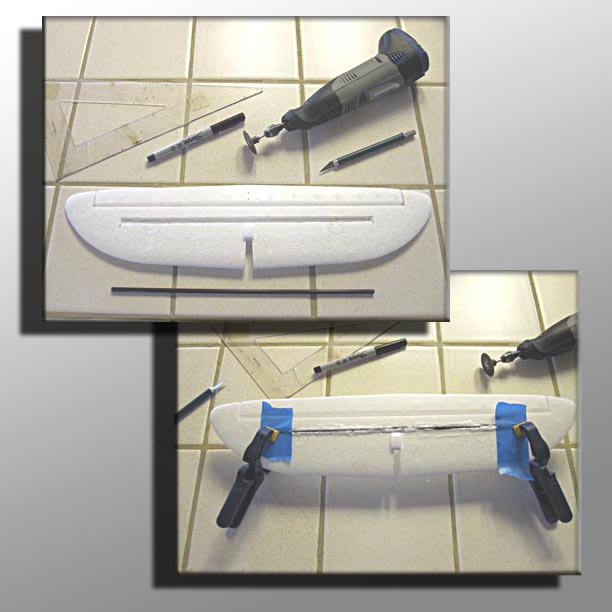
Reinforcing the Tailplane:
After flying my first AXN Floater for several months I found the tailplane (horizontal stabilizer) to be a little flimsy and easily broken during the occasional hard landing. Although easy enough to fix with packing tape or glue, I decided to add some reinforcement to my new Floater in the form of a 1/4 inch carbon fiber rod.
Start by cutting a 12inch piece of the carbon fiber rod. Next, center the rod on the bottom side of the tailplane and draw an outline around it's perimeter. Now with the help of a straight edge and a sharp x-acto, cut out the slot being careful not to cut too deep and through to the other side. Finally, I cleaned up the slot with my cord less Dremel using a cutoff disk, contiguously test fitting the rod as I worked.
Now it's time to glue the rod into the slot. I've had great success using the Faster Drying Gorilla Glue. It seems a little moisture helps this glue to cure, so I start by spraying a light mist of water over the slot. Next I run a bead of glue down the length of the slot. This glue will foam up significantly as it cures, so be careful not to use too much. Finally, insert the rod into the slot, tape and clamp. Set this aside for now. It will take a couple hours to dry.
|
 |
 |
Cutting an Access door for the Autopilot:
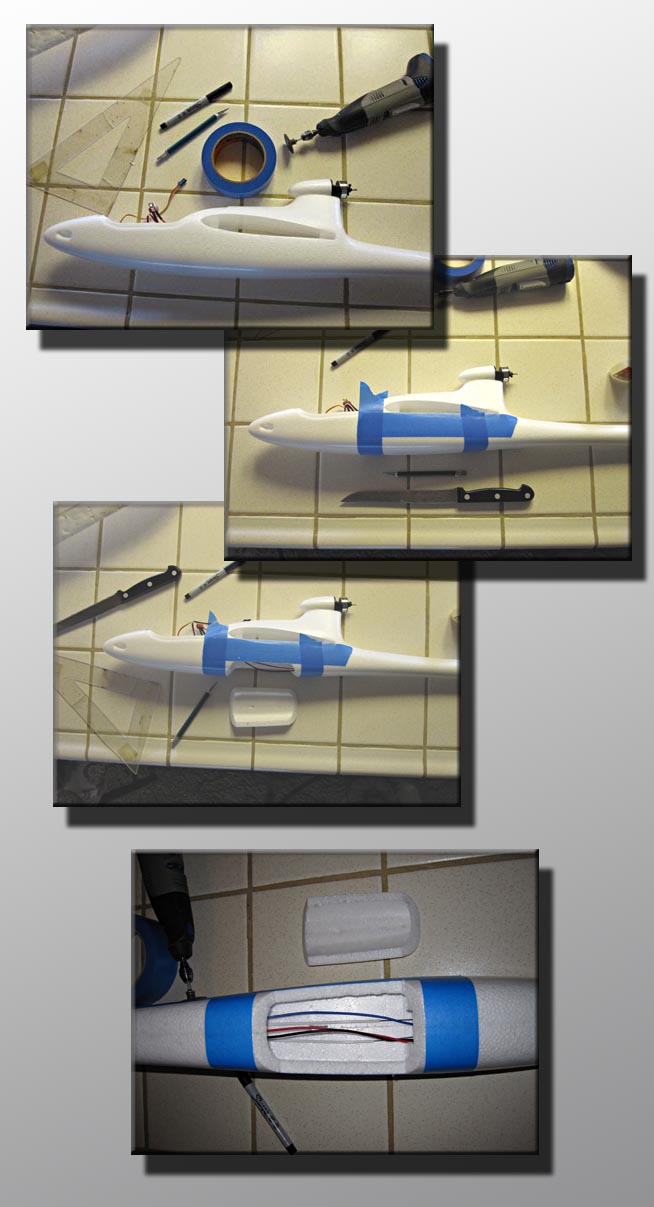
Unfortunately, the AXN Floater doesn't have quit as much internal space as the Easy Star. We need to find a little area to install the Autopilot. Fear not! It turns out there is ample space in the belly of the Floater, we just need to cut a door to get to it.
I Start by marking the outline of the hatch with masking tape. The front of the hatch approximately aligns with the leading edge of the wing and is 5 inches long. The depth of the hatch is about 3/4 of an inch.
Once marked, it's time to cut the hatch out. I used a bread knife to saw thru the leading and trailing edges of the hatch and decided to cut them at a slight angle. Then I cut the sides with an x-acto knife using the tape as a guide.
Once inside we have a nice flat surface to mount the autopilot to. Also inside we find the leads to the speed controller and the control rods for the elevator and rudder.
|