 |
Installing the Wings:
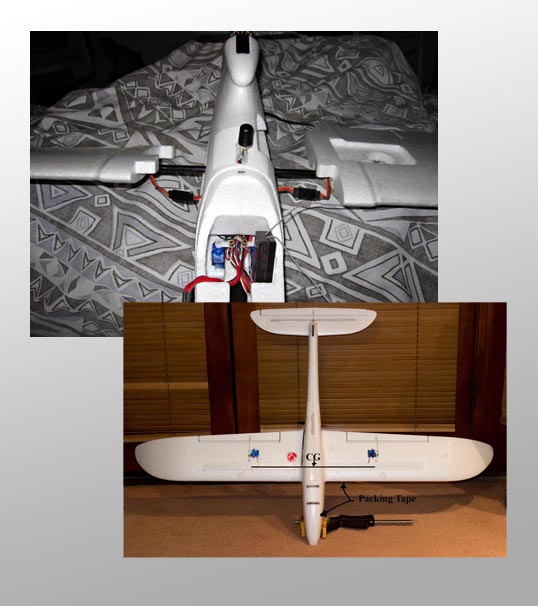
Although the EP foam is fairly tough, I opted to add a strip of the trusty clear packing tape along the leading edge of each wing. This toughens up the leading edge and makes it much more resistant to the inevitable brush landings that occur when desert flying. I also added a layer of tape on the bottom of the plane to add a little scratch resistance when landing in dirt. Once done, you can install the wings. Simply feed the carbon rod that is permanently installed in one wing through the fuselage and into the opposite wing. Push the wings together until the servo connectors can reach then plug them in. Finally, push the wings together until the foam interlocks engage. I've never trusted the foam interlock to hold during flight, so on the first floater I built I actually glued the wings in place. Doing this seemed to really stiffen the body, but meant the plane was a little harder to transport because the wings couldn't be removed. On this second build I simply add a little packing tape to each wing to help insure they stay in place. Now I can break the plane down to make it easier to pack into remote locations.
With the battery install, you can check the CG. It should fall right in the center of the foam strip that covers the carbon rod on the bottom of each wing. If using the same 2650mAh battery as I did, this should just happen without needing to add any ballast. Now your ready to power up the system and center the control surfaces. Once done your ready to fly!
|
|
Until Next Time.
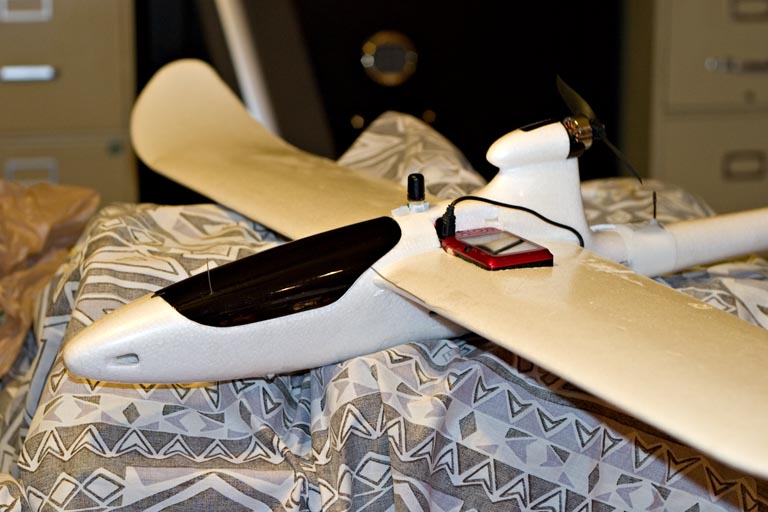
There she is. A thing of beauty. I didn't care much for the stickers that came installed on the plane. Aside from looking bad they had a tendency to come unglued from the foam. Admittedly, the orientation of the plane can be a little hard to judge with my ageing eyes so I'll be adding a paint scheme to help with that.
You will notice a camera installed in the wing and the associated USB cable used to trigger the capture in some of the photos. I'll be adding details about that in a latter post.
|
 |