 |
Introduction:
When developing an autopilot it can be a cumbersome and time consuming endeavor to load new code into the hardware, head out to the field, fly the aircraft (often putting it in mortal jeopardy with untested code), observe and document performance, head back to the lab, re-write code and repeat -> Sometimes dozens of times. Even after the software is largely developed it would be extremely convenient to be able to try out new flight paths and fix problems in the comfort of the shop, leaving you with confidence that the aircraft will perform as expected when you do hit the flying field. It would also be nice if this testing could be done with the actual flight hardware thereby minimizing any problems caused by differences in test and flight hardware setups.
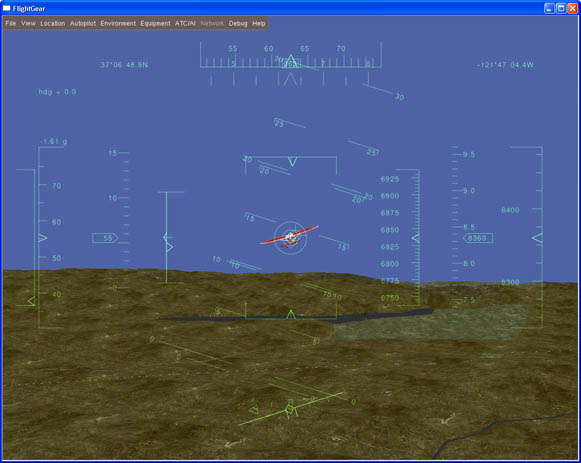
So what we need is something that can take the control surface commands (aileron, elevator and rudder) coming from our autopilot and figure out how those commands would make our aircraft move using all sort of complicated math. This thing would also need to calculate all the rates and accelerations the aircraft would be experiencing and send that information back to our autopilot so we could use that data in place of our IMU (which is experiencing no rate or acceleration changes since it's just sitting on our bench). It would sure be nice if this magic "thing" could also keep track of some virtual GPS location as we pretended to fly around as well as altitude and speed - all the data we would otherwise get from our onboard sensors if we were really out at the field flying our airplane. And finally it would be cool if this "thing" could present us with pretty pictures of our pretend aircraft flying around so we can intuitively see how our autopilot is working.
|
|
Enter "The Thing":
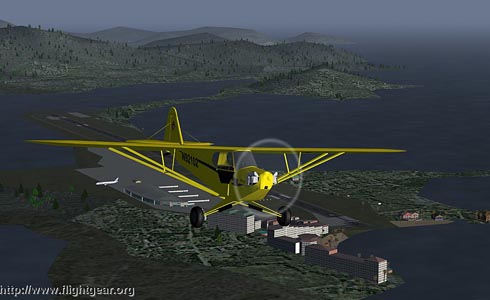
As it turns out there is software available that does pretty much exactly what we need. It's called Flightgear.
Flightgear is a free, open-source multi-platform flight simulator. There are other flight simulator programs that could work for our purposes such as X-Plane, but since Flightgear meets all our needs and is free we'll go with that.
The first hurdle to be jumped is how do we get all the data out of the Flightgear program that we need and how do we tell Flightgear what our control surface commands are. The makers of Flightgear thought of this (although perhaps for reasons other than what we're trying to do). They implemented a slick interface to their software that allows a user to pass data in and out of the program using a UDP socket, serial connection or a file. Since we want our data going back and forth to our autopilot hardware, the file option is not much use (although we could us it to log flight data for later analysis) so I thought the easiest interface would be serial using the PICPilots USB interface and com driver on the PC. As it turns out, Flightgear only allows data flow in one direction per com port connection and we need data going both ways. I could use the PICPilots telemetry interface for data in one direction and the USB interface for data flow in the other direction but this starts to get cumbersome and we may run into latency issues with the telemetry link so our only option is a UDP socket. The problem here is the PICPilot doesn't have a native UDP port so we'll need some custom software that can talk to the PICPilot via it's USB interface (Com port) and Flightgear via the UDP socket. This isn't all bad though. It will allow us to add some nice features since our application will be able to intercept and manipulate the data going back and forth. More on this special application later, first we need to figure out how to get Flightgear to pass the right data to us and use our commands to control the virtual aircraft.
|
 |
<?xml version="1.0" encoding="UTF-8"?>
<PropertyList>
<generic>

   <input>
      <line_separator>\r\n</line_separator>
      <var_separator>,</var_separator>

      <chunk>
         <name>aileron</name>
         <node>/controls/flight/aileron</node>
         <type>float</type>
         <!-- Unity Gain 0.00006103515625 = 1/16384 -->
         <factor>-0.000061</factor>
         <format>%f</format>
       </chunk>

      <chunk>
         <name>elevator</name>
         <node>/controls/flight/elevator</node>
         <type>float</type>
         <factor>0.000061</factor>
         <format>%f</format>
       </chunk>

      <chunk>
         <name>rudder</name>
         <node>/controls/flight/rudder</node>
         <type>float</type>
         <factor>0.000061</factor>
         <format>%f</format>
       </chunk>

      <chunk>
         <name>throttle</name>
         <node>/controls/engines/engine/throttle</node>
         <type>float</type>
         <factor>0.000061</factor>
         <format>%f</format>
       </chunk>

   </input>
</generic>
</PropertyList>
The "line_separator" and "var_separator" tell Flightgear what ascii characters will be used to delimit each variable and each packet. We need to make sure we have these inserted in the data we send or Flightgear will get lost when interpreting the received data. Each "chunk" section defines a variable we're interested in. In this case we will be passing data to Flightgear that will be inserted into these variables. The "name" section is a user defined named for the chunk and the "node" section tells Flightgear the name and location of it's internal variable that we will be manipulating. "Type" tells Flightgear how to treat the data we pass in (float,integer,bool) and "factor" is an optional gain term that can be applied to the data. In this case, PICPilot is a 32bit integer processor and most of the internal variables are stored and manipulated internally as such. I've chosen a 18.14 (or 17.14 if you count the sign bit) fixed point representation for most data which results in a scale factor of 16384. In other words, if I wanted to represent the number 1.0 I would define the value as 16384 in my fixed point representation. If I then wanted to convert my fixed point representation to a floating point number I would divide it by 16384 to give a floating point number of 1.0. I could perform this conversion before sending it from the PICPilot, but I wanted to leave it's code as streamlined as possible. So the gain factor applied to the data in Flightgear is 0.000061 which is 1/16384. If I send over the number 8192 it should be interpreted as 0.5 by Flightgear so it multiplies this by 0.000061 which gives 0.499. It should also be notes that flight gear is expecting the control surface commands to be between +/-1 representing full deflection in the positive and negative direction. This turns out to be the same way PICPilot represents the data other than being in fixed point format, so the gain term is the only processing that needs to be done to send these commands to Flightgear. The only remaining piece to this puzzle was direction of motion. A little trial and error determined this and that resulted in the negative gain being applied to the ailerons.
That defines the data going to Flightgear, now for the data going back to the autopilot. We want to pass back all the data that would normally come from our internal sensors. This includes angular rates, accelerations, Latitude, Longitude, altitude and speed (we can get both ground speed and airspeed from the simulation). It's important to keep in mind coordinate frames. Our autopilot is interested in body rates and accelerations because that's what the sensors measure that are attached to our airframe body. Flightgear can also put out earth frame data but we don't want that for our application. Here is the xml page for what I came up with.
<?xml version="1.0" encoding="UTF-8"?>
<PropertyList>
<generic>
   <output>
      <line_separator>,</line_separator>
      <var_separator>,</var_separator>

      <chunk>
         <name>p-rad_sec-x16384</name>
         <node>/fdm/jsbsim/velocities/p-rad_sec</node>
         <factor>16384</factor>
         <type>float</type>
         <format>%.0f</format>
      </chunk>

      <chunk>
         <name>q-rad_sec-x16384</name>
         <node>/fdm/jsbsim/velocities/q-rad_sec</node>
         <factor>16384</factor>
         <type>float</type>
         <format>%.0f</format>
      </chunk>

      <chunk>
         <name>r-rad_sec-x16384</name>
         <node>/fdm/jsbsim/velocities/r-rad_sec</node>
         <factor>16384</factor>
         <type>float</type>
         <format>%.0f</format>
      </chunk>

      <chunk>
         <name>x-accel-Gs-x16384</name>
         <!-- /fdm/jsbsim/accelerations/a-pilot-x-ft_sec2 -->
         <node>/accelerations/pilot/x-accel-fps_sec</node>
         <factor>509.231056132</factor>
         <type>float</type>
         <format>%.0f</format>
      </chunk>

      <chunk>
         <name>y-accel-Gs-x16384</name>
         <node>/accelerations/pilot/y-accel-fps_sec</node>
         <factor>509.231056132</factor>
         <type>float</type>
         <format>%.0f</format>
      </chunk>

      <chunk>
         <name>z-accel-Gs-x16384</name>
         <node>/accelerations/pilot/z-accel-fps_sec</node>
         <factor>509.231056132</factor>
         <type>float</type>
         <format>%.0f</format>
      </chunk>

      <chunk>
         <name>Latitude_Degx1000000</name>
         <node>/position/latitude-deg</node>
         <factor>1000000</factor>
         <type>float</type>
         <format>%.0f</format>
      </chunk>

      <chunk>
         <name>Longitude_Deg</name>
         <node>/position/longitude-deg</node>
         <factor>1000000</factor>
         <type>float</type>
         <format>%.0f</format>
      </chunk>

      <chunk>
         <name>Heading_Degx16384</name>
         <node>/orientation/heading-deg</node>
         <factor>16384</factor>
         <type>float</type>
         <format>%.0f</format>
      </chunk>

      <chunk>
         <name>Altitude_Meters</name>
         <node>/position/altitude-agl-ft</node>
         <factor>0.3048</factor>
         <type>float</type>
         <format>%.0f</format>
      </chunk>

      <chunk>
         <name>Groundspeed-msx16</name>
         <node>/velocities/groundspeed-kt</node>
         <factor>8.2311104</factor>
         <type>float</type>
         <format>%.0f</format>
      </chunk>

      <chunk>
         <name>Airspeed-msx16</name>
         <node>/velocities/airspeed-kt</node>
         <factor>8.2311104</factor>
         <type>float</type>
         <format>%.0f</format>
      </chunk>

   </output>

</generic>
</PropertyList>
The format is almost exactly the same as the receive data. The only major difference is the scale factors. Most of the data needs to be converted to my fixed point format before sending. This means multiplying by 16384. In addition some of the engineering units might be different than what PICPilot is expecting so that gain term is also rolled into the mix. I tried to include the units I'm expecting in the name of the chunk, and Flightgear often includes it's units in the name of it's internal variable. Looking at those two might help you decode what's going on.
All that remains now is how to tell Flightgear to use our custom protocols and how often to send the data. It's basically done when the program is started using command line options, but I'll cover that a bit later. Now on to the autopilot firmware changes.